首页
应用方案
用Raspberry Pi和传感器制作“可自动营造舒适空间的装置” 第四部分
用Raspberry Pi和传感器制作“可自动营造舒适空间的装置” 第四部分
来源:ROHM
作者:吉田
发布时间:2023-03-01
创作一款让家中更舒适、让在家办公更高效的设备,这个项目终于迎来了剧终篇。这次我们将会再增加一些功能,以完成这个项目。我们会添加一个根据天气预报信息和天气情况提示主人行动的功能,最终创作完成这个可以营造舒适环境的设备,让您即使在家办公也可以舒适地工作!
 本部分所需部件
Raspberry Pi 3 B+ 或 Raspberry Pi 4 Model B
本部分所需部件
Raspberry Pi 3 B+ 或 Raspberry Pi 4 Model B
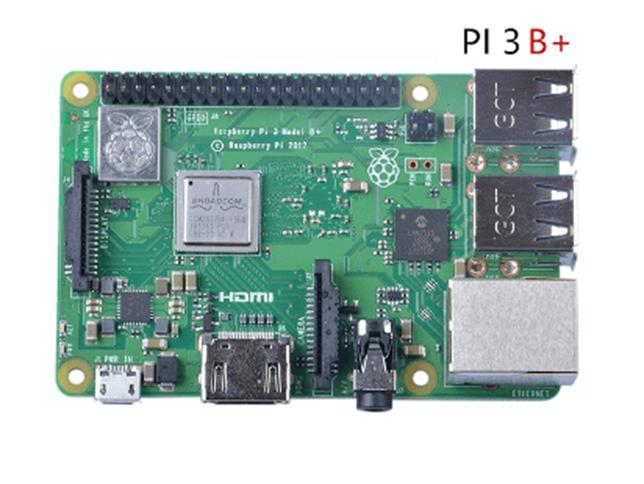 Raspberry Pi 3 B+
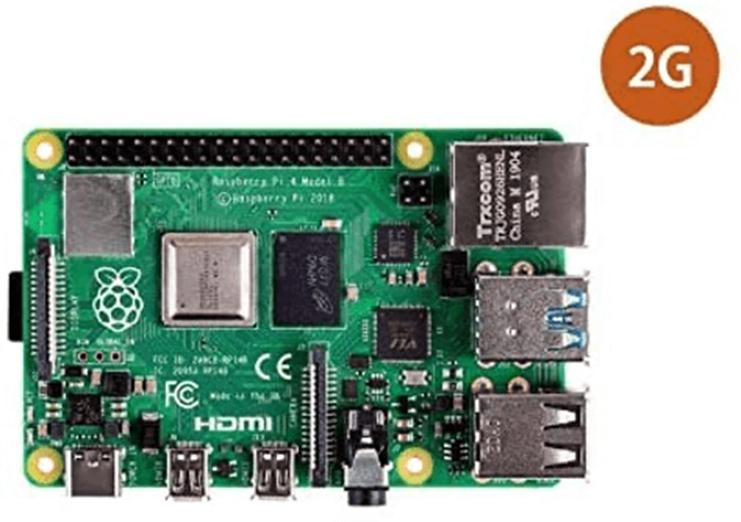 Raspberry Pi 4 Model B
Raspberry Pi用液晶显示器 或 触控显示器
Raspberry Pi 4 Model B
Raspberry Pi用液晶显示器 或 触控显示器
 Raspberry Pi用液晶显示器
 触控显示器
罗姆SensorMedal(SensorMedal-EVK-002)
触控显示器
罗姆SensorMedal(SensorMedal-EVK-002)
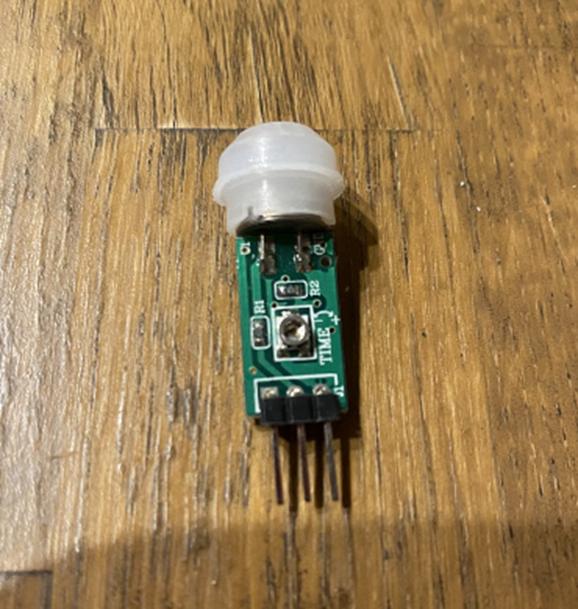
 热释电红外线传感器 (SB412A)
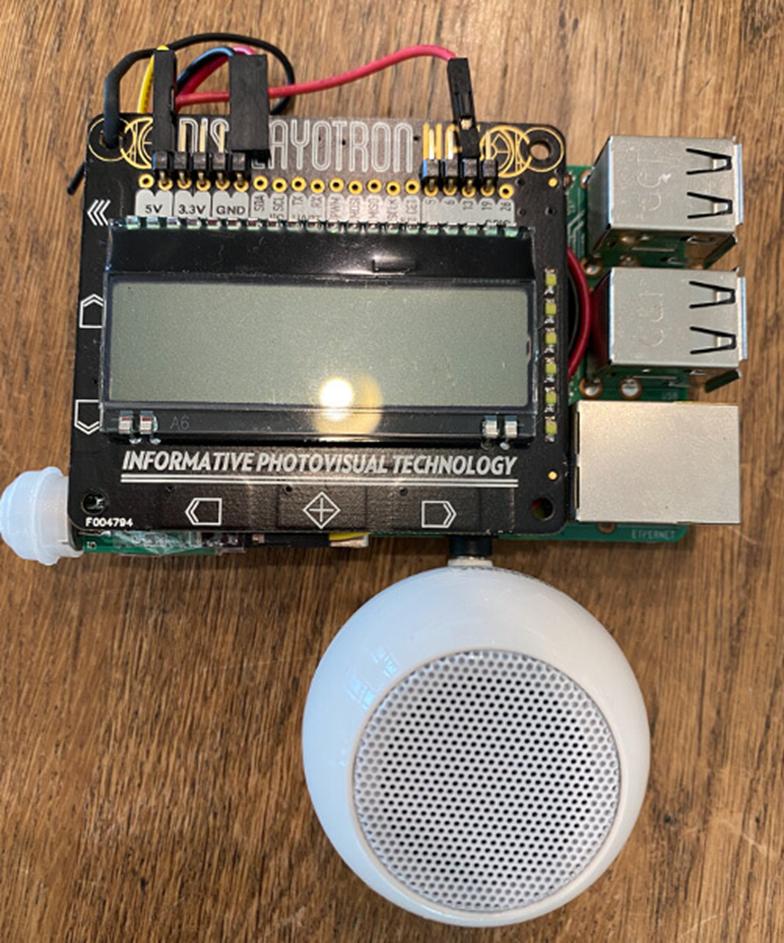
 小型扬声器
小型扬声器
 手机电池
手机电池
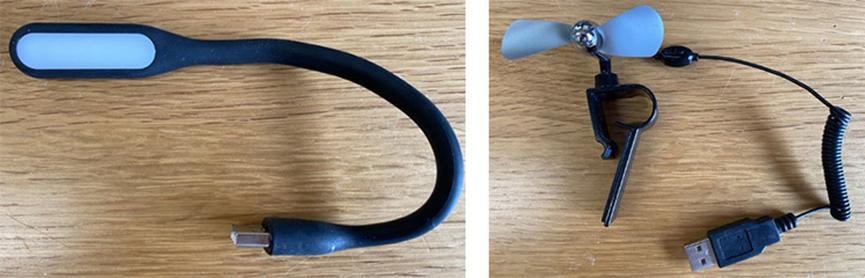
 USB设备
USB设备
 本部分的流程
根据传感器的值控制硬件
关联天气信息和互联网信息
完成这款可以营造舒适环境的装置
总结
1. 根据传感器的值控制硬件
在第二部分中,我们使用SensorMedal测量了温度和湿度;在第三部分中,我们添加了人体传感器。最初,我们也是打算利用传感器的值来实现下面这些功能的,所以让我们来把它们变为现实吧。
本部分的流程
根据传感器的值控制硬件
关联天气信息和互联网信息
完成这款可以营造舒适环境的装置
总结
1. 根据传感器的值控制硬件
在第二部分中,我们使用SensorMedal测量了温度和湿度;在第三部分中,我们添加了人体传感器。最初,我们也是打算利用传感器的值来实现下面这些功能的,所以让我们来把它们变为现实吧。
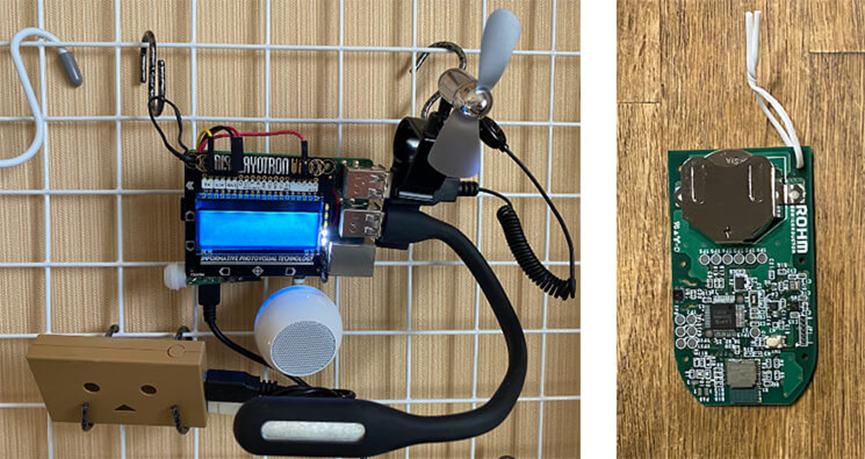
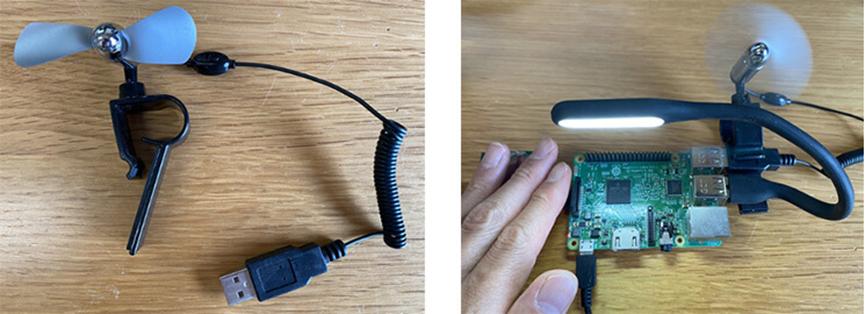
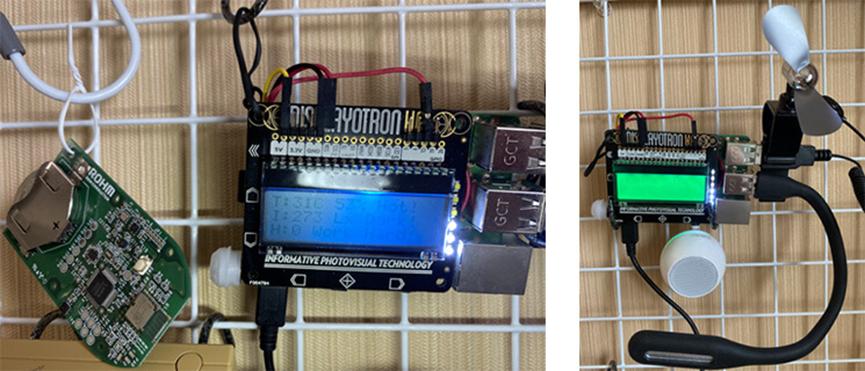
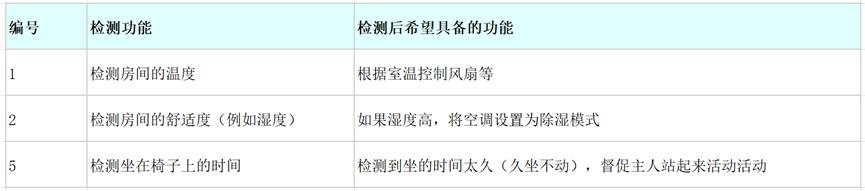 首先是检测完温度后,如果室温高于一定水平,需要自动打开风扇保持凉爽。在Raspberry Pi上插入USB迷你风扇。
 要想让风扇根据室温情况打开或关闭,需要使用第二部分中用过的hub-ctrl命令来控制Raspberry Pi的USB功能。例如,当室温超过26℃时,给USB通电让风扇转起来。
另外,当使用人体传感器测得您在工作台周围停留超过某一时长(久坐)时,让Raspberry Pi发出声音来提醒您可能会很有趣。下面,我们将迷你扬声器插入Raspberry Pi。
要想让风扇根据室温情况打开或关闭,需要使用第二部分中用过的hub-ctrl命令来控制Raspberry Pi的USB功能。例如,当室温超过26℃时,给USB通电让风扇转起来。
另外,当使用人体传感器测得您在工作台周围停留超过某一时长(久坐)时,让Raspberry Pi发出声音来提醒您可能会很有趣。下面,我们将迷你扬声器插入Raspberry Pi。
 获取名为“AquesTalkPi”的可以朗读的语音合成软件,在Programs下解压。
$ cd ~/Programs
$ wget http://www.a-quest.com/download/package/aquestalkpi-20130827.tgz
$ sudo tar zxvf aquestalkpi-20130827.tgz
$ cd aquestalkpi
然后,我们尝试让它播放“该休息了”之类的声音。
$ ./AquesTalkPi "休憩しましょう!" | aplay
要实现这些功能,需要在第三部分中使用过的ble_lcd.py程序中,添加下面的第2行、第29〜36行(温湿度控制)和第4〜6行、第12〜17行、第38〜43行(人体传感器控制)的内容。
[ble_lcd.py]
…
import os
human_count = 0
human_check = 30
aquest_path = "/home/pi/Programs/aquestalkpi/"
scanner = btle.Scanner()
while True:
…
human = GPIO.input(human_pin)
if human == 1:
human_count+=1
else:
human_count=0
print('HCount:'+str(human_count))
...
# 针对接收到的数据,对每一个BLE设备进行处理
for dev in devices:
...
'''
for key, value in sorted(sensors.items(), key=lambda x:x[0]):
print(' ',key,'=',value)
'''
temp = sensors['Temperature']
humid = sensors['Humidity']
if temp > 26 or humid > 60:
temp_msg = "Hot!"
os.system("sudo hub-ctrl -b 1 -d 2 -P 2 -p 1")
else:
temp_msg = "Not bad"
os.system("sudo hub-ctrl -b 1 -d 2 -P 2 -p 0")
human_msg = str(human_count)
if human_count > human_check:
human_msg += ' Take Rest!'
os.system(aquest_path+'AquesTalkPi "休憩しましょう!" | aplay')
else:
human_msg += ' Work Hard!'
获取名为“AquesTalkPi”的可以朗读的语音合成软件,在Programs下解压。
$ cd ~/Programs
$ wget http://www.a-quest.com/download/package/aquestalkpi-20130827.tgz
$ sudo tar zxvf aquestalkpi-20130827.tgz
$ cd aquestalkpi
然后,我们尝试让它播放“该休息了”之类的声音。
$ ./AquesTalkPi "休憩しましょう!" | aplay
要实现这些功能,需要在第三部分中使用过的ble_lcd.py程序中,添加下面的第2行、第29〜36行(温湿度控制)和第4〜6行、第12〜17行、第38〜43行(人体传感器控制)的内容。
[ble_lcd.py]
…
import os
human_count = 0
human_check = 30
aquest_path = "/home/pi/Programs/aquestalkpi/"
scanner = btle.Scanner()
while True:
…
human = GPIO.input(human_pin)
if human == 1:
human_count+=1
else:
human_count=0
print('HCount:'+str(human_count))
...
# 针对接收到的数据,对每一个BLE设备进行处理
for dev in devices:
...
'''
for key, value in sorted(sensors.items(), key=lambda x:x[0]):
print(' ',key,'=',value)
'''
temp = sensors['Temperature']
humid = sensors['Humidity']
if temp > 26 or humid > 60:
temp_msg = "Hot!"
os.system("sudo hub-ctrl -b 1 -d 2 -P 2 -p 1")
else:
temp_msg = "Not bad"
os.system("sudo hub-ctrl -b 1 -d 2 -P 2 -p 0")
human_msg = str(human_count)
if human_count > human_check:
human_msg += ' Take Rest!'
os.system(aquest_path+'AquesTalkPi "休憩しましょう!" | aplay')
else:
human_msg += ' Work Hard!'
 2. 关联天气信息和互联网信息
最后,我们可以从网上获取天气预报等信息,这样会很方便。如果要下雨,最好让它大声朗读并提醒主人采取必要的行动。
2. 关联天气信息和互联网信息
最后,我们可以从网上获取天气预报等信息,这样会很方便。如果要下雨,最好让它大声朗读并提醒主人采取必要的行动。
 首先,我们需要使用名为“OpenWeatherMap”的服务来获取天气预报。如下图所示,该网站是英文的,但是从上面可以轻松获取日本国内天气,所以我们将使用这里提供的API。
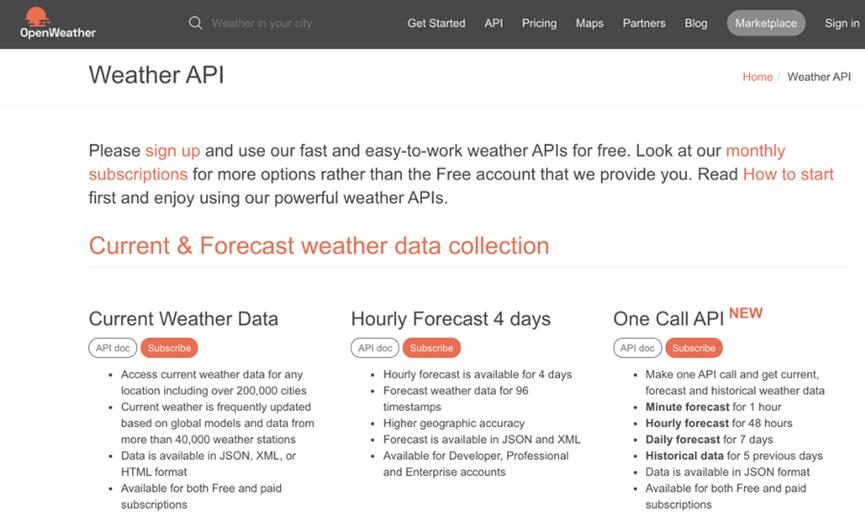 从该页面的右上方创建一个帐户并登录。
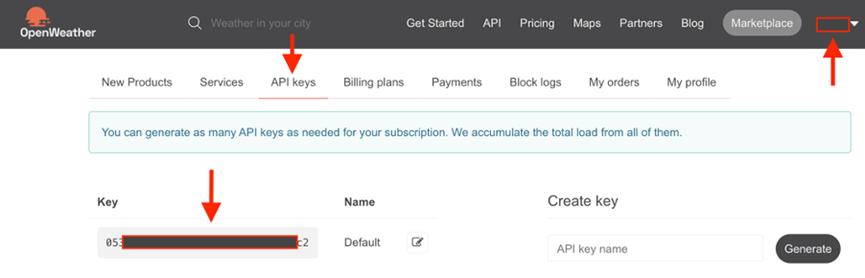
然后进入称为“API Keys”的页面,确认Key(秘钥)并复制此密钥。
 接下来,我们需要创建一个可以获取天气预报的程序。首先,要安装以下库文件。
$ sudo pip3 install pytz requests
创建一个名为“forecast.py”的示例程序。将刚刚复制的密钥输入API_KEY部分。另外,需要在ZIP部分输入您的邮政编码,并添加国家代码“JP”。下面,我们让刚刚的Aquestalk软件也能够播报天气吧。
[forecast.py]
#! /usr/bin/python3
# -*- coding: utf-8 -*-
import json
import datetime
import os
import requests
import sys
from pytz import timezone
API_KEY = "XXX"
ZIP = "123-4567,JP"
接下来,我们需要创建一个可以获取天气预报的程序。首先,要安装以下库文件。
$ sudo pip3 install pytz requests
创建一个名为“forecast.py”的示例程序。将刚刚复制的密钥输入API_KEY部分。另外,需要在ZIP部分输入您的邮政编码,并添加国家代码“JP”。下面,我们让刚刚的Aquestalk软件也能够播报天气吧。
[forecast.py]
#! /usr/bin/python3
# -*- coding: utf-8 -*-
import json
import datetime
import os
import requests
import sys
from pytz import timezone
API_KEY = "XXX"
ZIP = "123-4567,JP"